Tuesday, December 16, 2008
The Next Morning
After the big snow, the next day dawned bright and clear. Although the temperature stayed below freezing, the sun and wind managed to melt, sublimate, or displace most of the white crystals that graced yesterday's tree branches. The quantity of snow was less, but a new kind of beauty took over, so I grabbed the camera and started shooting.
Snow is a notoriously difficult subject to photograph in sunlight. If you expose for the snow details, the shadows are unattractively dark:
If you expose for the shadows, the snow is blown out to white:
Of course, the answer is HDR, which can bring both extremes into balance:
If you'd like to see more next-day snow photos, click here for all seven shots, including some pre-dawn light shows. (By the way, all of the daytime snow shots used HDR.)
Sunday, December 14, 2008
Snow in Tualatin!
Usually, Tualatin is in the Banana Belt when everyone else gets snow. But today, it was our turn. While it was relatively warm north of the Columbia River and south of Salem, we got a 3" accumulation throughout the day! Cool!
Here are three more shots, if you are interested; nothing fancy, but unusual for our yard!
Fun! :-)
Tuesday, December 2, 2008
Bashful Moon Visits Venus & Jupiter
On Sunday, the young crescent Luna jumped above the horizon to join Venus and Jupiter, whose close conjunction was already in progress. It was a bit hazy in Tualatin, with some sunlit clouds giving the Moon something to hide behind. This helped equalize the exposure for the planets, showing them as bright sky beacons through the haze.
(Click on the image for a bigger view, or click here for the full-res version.)
On Monday, the Moon snuggled up even closer to the planets, but unfortunately Tualatin was socked in with clouds. Oh well; I enjoyed my Sunday show nonetheless! :-)
Saturday, November 8, 2008
Fall Context
Thursday, October 30, 2008
Cannon Beach Aviary
When people think of Cannon Beach, Oregon, I'll bet most of them picture Haystack Rock. And indeed, an edifice that resembles a huge pile of dry straw is hard to miss. But when it comes to counting photos, the number of my Haystack Rock pictures pales in comparison to the number of birds I have captured (photographically) at the artistic town of Cannon Beach.
If you would like to see 14 of my favorite Cannon Beach Aviary shots, click here.
Each of the photos except the signature Haystack Rock shot has at least one prominent bird gracing the picture. Even this one, in case you didn't notice:
The picture above shows a water fowl calmly riding in the wake of the maelstrom -- the same bird as in the previous photo in the Flickr set:
P.S. Did you notice that this posting does not have a single HDR photo? Nor anything in space? Yes, I do take some ordinary-exposure terrestrial shots! :-)
Wednesday, September 10, 2008
If Jupiter Hugged Luna
This picture cannot be taken with a single exposure. There is a 128x difference in brightness between our Moon and the moons of Jupiter. The only way to get a photo like this is to take separate exposures of Jupiter and the Moon, then combine them into the same picture.
In this case, I placed placed the celestial objects right next to each other to enable size comparison. Both objects were captured with the same magnification. Seen side-by-side, you can see that the Jovian system is spread out at about 1/3 the apparent lunar diameter.
Click on the picture above for a larger view. Or, here is the full-res version and the full-frame version. Technical details, if anyone cares:
* Lens (both shots): Canon 70-300mm zoom at 300 (480mm equivalent for 35mm magnification).
* Moon: 1/45 second, f/9.5, ISO-200. 25 shots stacked with RegiStax.
* Jupiter: 1/2 second, f/5.6, ISO-800. 25 shots pared down to 10, then stacked with RegiStax.
In case you hadn't noticed, I'm really enjoying astrophotography with a camera and tripod! But of course it won't last much longer -- this is Oregon, after all, and the rainy season is on the way. Oh well; fortunately we have APOD, rain or shine!
Thursday, August 14, 2008
Clearly Amazing Moon
Last night I took the best picture of the Moon I have ever been able to capture, using a 10.1 megapixel DSLR with a 300/480mm lens, a sturdy tripod, and a focusing method using "nearby" Jupiter which guaranteed maximum sharpness. (Maximum for me, that is -- of course if I had a camera-equipped telescope I could fill the photo frame with the moon, and I would have a better picture. But I digress.)
Here is a zoomed-in portion of the result:
Then, I took 24 more pictures just like it. So, all 25 photos were identical, except for different details getting smudged by the atmosphere and camera sensor noise. Combining them all together with RegiStax resulted in this photo, zoomed in to the same lunar region as in the image above:
To see the full impact of the improvement, you might want to look at a side-by-side comparison of the whole Moon, before and after stacking:
This calls for a paradigm shift. I had formerly known that image stacking was used by both amateur and professional astronomers, but didn't fully appreciate how it might benefit my casual efforts at sky-shooting. Now its impact to my work is "clearer." A lot clearer.
Wednesday, August 13, 2008
Stacking the Odds; Hushing the Noise
Air molecules are big -- much, much larger than the light photons struggling to get through the Earth's atmosphere from space to my camera's sensor. So, when I photograph something in the nighttime sky, there is a significant probability that some details will get smudged by the plethora of air molecules in the way.
Another problem is in the camera's sensor itself. Many sky objects are dim, so it is necessary to increase the ISO setting -- analogous to the old "film speed." Higher light sensitivity allows dimmer objects to be imaged. Except for the pesky noise. Higher ISO values result in random image artifacts -- visual "noise" that detracts from the image.
Mike to the rescue! He found a freeware software tool that significantly helps with both of these problems: RegiStax, which implements a concept called image stacking. The idea is simple: take many pictures of the same object. Details that are smudged by air movement in one frame will likely be sharper in another frame. Also, random image noise can be subtracted because the "real" image is not random.
As a test, I cranked up my camera's ISO to 1,600 -- a level that is guaranteed to cause significant image noise. Then, I shot 23 pictures of Jupiter through an almost-dark dusky sky. The result was about what I expected: grainy photos of an inconsistent image of Jupiter and its moons. Here is the best of the 23:
After running the 23 shots through RegiStax, the image had a stunning improvement of clarity and quality:
Another tool in the arsenal for this casual astrophotographer! (Thanks, Mike!)
Monday, August 11, 2008
HDR Takes a Walk Around Vernonia Lake
Sunday after church, Kathy and I visited Vernonia, a small Oregon town whose main tourist attraction is the adjacent lake. It takes about 10 minutes to circumnavigate the lake on the nicely-paved walking path -- 30 minutes if you take time to photograph what you see along the way.
Assuming, that is, photography is capable of capturing and conveying what you see. For one of the scenes we encountered, the phrase comes to mind: "The picture doesn't do it justice." At least, that was true for ordinary photography. But a three-shot HDR photo saved the day. Here is a normal shot of an old mill building, followed by the High Dynamic Range version. (The latter matches much more closely what I saw with my own eyes as I gazed up at the edifice.)
From the mill location looking back across the lake, another shot demanded HDR to "do it justice." The first picture was exposed to show the detail in the picnic table, which unfortunately results in a completely washed-out sky. (Exposing for the sky makes the picnic table nearly disappear into a shadow.) HDR photography to the rescue:
If you would like to see seven more shots (with captions) from Vernonia Lake, click here.
Monday, August 4, 2008
Youthful Crescent Moon
Sunday night is when we take our trash and yard debris bins to the curb for pick-up the following morning. On the way back to the house from that rather mundane errand, I beheld a very young crescent moon setting in the west. After dashing inside to get my camera and a tripod, this is what I captured:
If you look closely, you can see cratering at the terminator. But IMHO, the best part of this shot is how the crescent is nestled in the distant trees.
Note that autofocus would probably have chosen to make the trees sharp, at the expense of the more distant moon. In order to make sure I was focusing on celestial objects rather than the Oregon deciduous trees, I enlisted the help of Jupiter. It was in the southeast, and became a handy beacon for me to manually focus on "infinity" using diffraction spikes.
"Goodnight, young little Moon! Sleep well!"
Monday, July 21, 2008
Galileo and the Space Station
Although Galileo did not invent the telescope, his increasingly powerful instruments revolutionized our understanding of the vast universe.
Yesterday evening at 10:39pm in Tualatin, what would Galileo have seen through one of his early telescopes, with its 9x magnification? Well, there would be Jupiter, of course, with its four visible moons. And the Moon would soon rise, so he could examine the cratering.
But wait! What is that "star" moving majestically through the heavens, from west to east? Bright as Venus, what could it be?
"Quick, Mr. Galilei -- get your telescope! Oh, you didn't bring it with you through the Time Portal? Here, use my telephoto lens! It magnifies nine times; about the same as your newly-improved telescope. Still see only a bright dot? No problem; just push that button near your finger, and the image will be magically captured for later, additional study."
So, that's what "Galileo" did last night, and here is the result:
Okay, I suppose Galileo did not have a 10.1 megapixel image sensor on the viewing end of his telescope. Nor did he have the ability to magnify an additional 2x in a photo editor, or increase the contrast a bit. (You can click on the image for the original, full-frame shot.) But if he had, I wonder what Galileo would have thought about the gold-colored appendage?
"Oh, the golden tail Mr. Galilei? That's one of the celestial dragon's solar cell arrays." :-)
Friday, July 11, 2008
Saturn and Mars Together
Here is another quick lunchtime blog entry, to show the results of last night's shooting. Saturn and Mars had their closest conjunction for the next 14 years: only 0.25 degrees apart in the sky. (That's close enough to fit behind the tip of your little finger held at arm's length.)
First of all, here is how the images turned out separately (magnified in a photo editor); you can clearly see Saturn's rings, and can almost see some surface coloration on Mars' disk. Of course, much better amateur telescopic images of these planets exist -- but I'm impressed at what can be done with a simple telephoto lens!
Here they are together; click on the image to see a bigger view.
In order to show you any detail at all, I had to crop fairly tightly. (Click here for the original full-frame image.) The astonishing thing is that you can see Saturn's rings in the same shot with Mars.
Perhaps more incredible to me was what I saw by looking through my small Celestron telescope; I could see Saturn and Mars at the same time, without moving the telescope. That's something that doesn't happen every day! (Or year, or decade in this case!)
I mentioned in an earlier blog entry that someday I'd like to mate the camera with a telescope. Unfortunately, "someday" could be a long time in the future (probably never), since that would require one or two orders of magnitude higher time and resource commitment.
In the meantime, I'm thoroughly enjoying Casual Astrophotography.
Thursday, July 10, 2008
Astrophotography With a Camera and Tripod
There have been some questions about the setup/procedure I used for the "Jupiter and His Minions" shot. So, I figured I'd do a quick lunchtime blog entry to describe the technique.
If you click on the photo above, you'll get the original, full-resolution image. The first thing you'll notice is that I did not see anything like the final picture in my camera's viewfinder. Instead, I saw a mostly black frame with a tiny white dot in the middle. Thanks to the Canon XTi's 10-megapixel resolution, a tightly-cropped view of the frame center shows the Jovian moons, in color.
In order to show the moons, it was necessary to significantly overexpose Jupiter's disk (ISO-800, 1/2 sec, f/5.6). Here is what it looks like when the picture is exposed for the planet's disk itself (ISO-800, 1/30 sec, f/16):
Notice that the disk appears much larger in the overexposed shot. This is due to one of the well-known problems faced by astronomers ever since the camera was invented: bright stars make bigger dots in an astrophotograph. Even though all of the stars have the same apparent size -- they are point-sources with no discernible diameter -- brighter ones "look" bigger in the picture. Although a planet like Jupiter does have visible width, overexposure makes the disk look bigger than it ought to be. Oh well.
Another tricky thing about astrophotography is getting the image in focus. It's harder than it sounds, since most lenses (even set for Manual) don't have a hard stop at "infinity." And when the target object is small and dim, it can be impossible to judge sharpness by eye. A camera's autofocus sometimes works, but not at the granularity needed -- and often it fails to lock on to a celestial object completely.
I used manual focus, aided by a modified Hartmann mask to create diffraction spikes. You can read about it here:
http://www.astronomy-pictures.com/Imaging-Tips.htm#focus2
On a bright point source (my bare maglight bulb), here is what it looks like when it's almost in focus; two images are coming together into one:
When focus is attained, twelve diffraction spikes appear radially around the point:
There is a saying: "In theory, there is no difference between theory and practice. But in practice, there is." When I used the technique on Jupiter, the spikes were a bit mushy, perhaps due to the fact that it was not actually a point source:
However, it got the job done. I suspect that Venus -- bright and small -- will work better with diffraction spike focusing. But that will be a different astrophotography adventure.
Tonight (July 10), I hope to capture Saturn and Mars on their closest conjunction for the next 14 years. They will be in the west, shortly after sunset.
Wednesday, July 9, 2008
Jupiter and His Minions
Jupiter is making its closest 2008 approach to Earth tonight. Last night I aimed my 300mm telephoto (480mm film equivalent) in the direction of the Jovian system, and captured the planet with four of its largest moons:
One of these days, I'll mate my camera to a telescope, and then I'll be a "real" amateur astrophotographer. In the meantime, I was surprised what could be done with a simple tripod and camera.
Saturday, July 5, 2008
Fire Flowers
It's July 5th, which naturally falls after the 4th of July. I can imagine that the Flickr servers are chugging away at full speed, servicing the uploads from photographers who think their shots of their fireworks are better than those of a bazillion competitors out there.
Well, I have no illusions that my Fire Flowers from the Tigard fireworks display are better than others'. But one thing I can pretty much guarantee: they are unique. A gorgeous landscape scene will likely be photographed hundreds of times per year, and 95% of those shots will be nearly identical. The other 5% will be differentiated on some environmental thing like pretty cloud formations or a sunset. Sometimes, a creative photographer will find or make something different about the recorded scene. But it's still the same scene.
In contrast, firework photos are by their very nature unique. There is no well-defined start or stop of any given exposure, so each photographer will get something different from the same gunpowder blasts that light up the sky.
So without further ado, here is my contribution to the massive July 5th Flickr upload event. Click here or on the picture below to view a full-window slideshow of 25 unique Fire Flowers.
Wednesday, June 25, 2008
Dynamic World Thwarts Dynamic Range Photography
I'm seeing the world with a new awareness now. It's in constant motion -- trees, clouds, birds, people, and various other objects. And unfortunately, motion thwarts multi-shot HDR. This is demonstrated by some of my HDR attempts during the recent Tigard Festival of Balloons.
This photo looks fine in the thumbnail view; I used HDR techniques to balance out the bright sunlit clouds with the blue sky and darker clouds, forming a nice backdrop for a silhouetted hot air balloon. However, click on the photo for a bigger view, and you'll see a big problem.
Specifically, the balloon moved enough during the three HDR shots (taken 0.33 seconds apart) to create ghosting. Here is a close-up:
The HDR software makes some attempt to minimize ghosting due to picture object movemement, but there is only so much it can do.
Until cameras start getting built with High Dynamic Range sensors to capture contrasty motion scenes in one shot, much of the dynamic world will remain out of reach of HDR photography.
Sunday, June 22, 2008
Father's Day Flight
Last Friday, David took me on a Father's Day flight, where we got to do the maneuvers and such that I had always heard about, but had never experienced personally: stalls, lazy eights, tight turns, short landings, etc. I even got to take the controls for quite a awhile -- not for the fancy maneuvers of course -- but I was able to make some 360-degree turns, altitude changes, etc. while at the same time scanning the sky for obstructing traffic.
During times I was not in "control" of the Cessna 206, I shot some photos, naturally. Most of them were the ordinary mountain vista pictures, but here is a fun one that's a favorite of mine:
In the cropped version, you can see the reflection a bit better:
If you want to see the rest of the "ordinary" photos, click here for a slideshow.
Saturday, June 21, 2008
Full of Hot Air
Apparently I was full of hot air to think that it might not be obvious. But "Daniel-Man" was the first to comment, so he (and his Mom-emanuensus) gets the prize of unbridled admiration from Grandpa! :-)
Here are a couple of other views of the same balloon, which was among several that went directly over our house during the annual Tigard Balloon festival.
"What Is It?" Revisited
I had so much fun with animal "What Is It?" photos, I figured it would be good to challenge you all with a non-animal whatisit. Click on the image for a larger version. Once you have figured it out (or have a guess, or maybe it's obvious), add a comment with your view, and we will see who gets there first! :-)
Wednesday, June 18, 2008
Digital Zoo
For my Father's Day activity, I went to the Oregon Zoo with Kathy, Marybeth, and Amanda. Oh, and of course I took my fancy-dancy digital SLR. I came back with two sets of photos: 1) A small collection of birds that posed for me, and 2) A series of animals which inspired me to post some "What is it??" pairs.
To see a slideshow with the "What is it??" pairs, go here, or click this picture:
For a slideshow of eight cool birds, go here, or click this picture:
My favorite from the Father's Day zoo photos is the wide-billed bird examining its reflection in the water. A secondary favorite is the time-frozen splash from the water fowl diving below the surface.
The ever-morphing cloud of flying insects delivered a nice surprise for me. I saw the swarm at a distance as bright points of light against a dark background, and thought it would be cool to capture a nicely-shaped group of bug stars. When I zoomed up on the photos later, I exclaimed out loud, "Wow, they have legs!" And wings, of course. Much cooler than the simple dots of light I had expected.
The bat pictures were a fun technical challenge. To get them, I had to crank the camera's ISO up to 1,600 -- the first time I have had to do that for real (i.e. outside of test shots) since I got the DSLR. The bats were in near-constant motion. The camera's image stabilization helped mitigate the slow shutter speed for these hand-held shots (1/30th and 1/6th second), but I had to shoot at just the right moment for the bats to be motionless enough for the photo.
For the hippo shot, it was necessary to use HDR (High Dynamic Range) photography, due to his (her?) bright sunlit back and deep-shadowed front. Don't ask me why the hippo felt compelled to use a rock as a pillow for his chin.
Speaking of HDR, I'm learning about some of its limitations. More about that in a later posting.
Thursday, June 12, 2008
Monitoring the Differences
I realized that my monitor at work has much higher color saturation than the one I used at home to prepare the horse-and-mount-hood HDR photo. Since I don't know how my regular reader's own monitors behave color-wise (all three of you ;-), I figured it might be good to put it to a vote.
Please click on the image below for a large view, then leave a comment saying which looks better: "Left" or "Right." Thanks.
Monday, June 9, 2008
Bashful Moon meets Mr. HDR
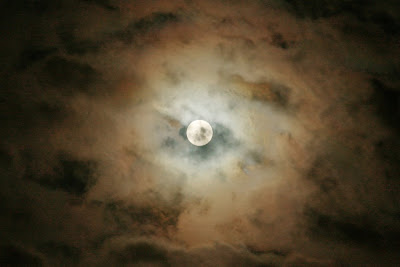
In my 6/7/2008 "Bashful Moon" posting I said, "There is a technology coming of age [High Dynamic Range photography] that will do this kind of thing automatically -- digitally combining multiple exposures, to bring out the detail from all of them."
Well, here are two original exposures of the Bashful Moon. The first one shows the Moon's disk, but only the closest clouds are visible. There are plenty of clouds in the second exposure, but the Moon has completely disappeared into the highlights:
Running them through the Photomatix HDR image processing software gives the following result. Both the Moon's disk and the clouds are nicely visible.
Cropping makes it more interesting. You can clearly see that the reddish coloration around the moon forms a ring. This was evident when I viewed the cloud-shrouded Moon that night, but neither single exposure reveals that fact; only the combined image shows what I actually saw with my own eyes.
Just for jollies, I also cropped it the same as the 6/7/2008 posting. The color border around the Moon is still visible as a ring, yet that feature was not evident at all in the earlier blog entry.
I don't know about you, but I think this is cool stuff.
Sunday, June 8, 2008
HDR Photography Comes of Age
HDR Photography -- High Dynamic Range -- has come of age. Although I'm sure there are more improvements to come, the problems I encountered in 2006 (e.g. alignment difficulties) have been solved.
As an experiment today, I shot some photo triplets from Baker Road outside Sherwood. For each view, I bracketed two stops in each direction. One of them had a horse that conveniently posed, motionless, through all three shots. Here are the original shots, the last of which is the best compromise between blowing out highlights on the horse, showing the mountain's snow, and making detail visible in the valley trees (you can click on the images for larger views):
I ran the images through a fresh trial version of Photomatix (mentioned in my previous posting), a program that derives a High Dyanamic Range image from the multiple exposures, then maps the tones to what can be rendered on a screen or print, yet preserving details in all luminosities. Here is the result:
My first response was, "Wow!" The subtle details in the horse's coloration and the valley trees have been preserved, yet the mountain snow and clouds are beautiful in the background. Here is a final cropped view:
I'm going to have to re-think my whole approach to high-contrast scenes, knowing this technology exists.
Subscribe to:
Posts (Atom)